If you have ever squinted at Windows 11 and thought, “I just need the text to be bigger,” you are not alone. The good news is that you do not have to lower your screen resolution—which makes everything blurry and wastes your display—to make text readable. Windows 11 has several built-in ways to enlarge text and interface elements while keeping your resolution exactly where it should be.
Here is how to do it, from the simplest fix to the more comprehensive options.
First: Understand the Difference Between Text Size and Display Scaling
Windows 11 gives you two related but distinct controls:
Text size changes the size of text in Windows and many apps, but leaves icons, buttons, and other interface elements largely untouched.
Display scaling enlarges text, apps, and other items together—like zooming in on the entire interface—without changing the actual screen resolution.
Neither option changes your resolution. Both are safe to adjust, and both can be reversed.
Method 1: Use the Text Size Slider (Just the Text)
This is the most direct answer to “make text bigger.” Windows 11 includes a dedicated Text size slider under Accessibility.
How to do it:
Open Settings.
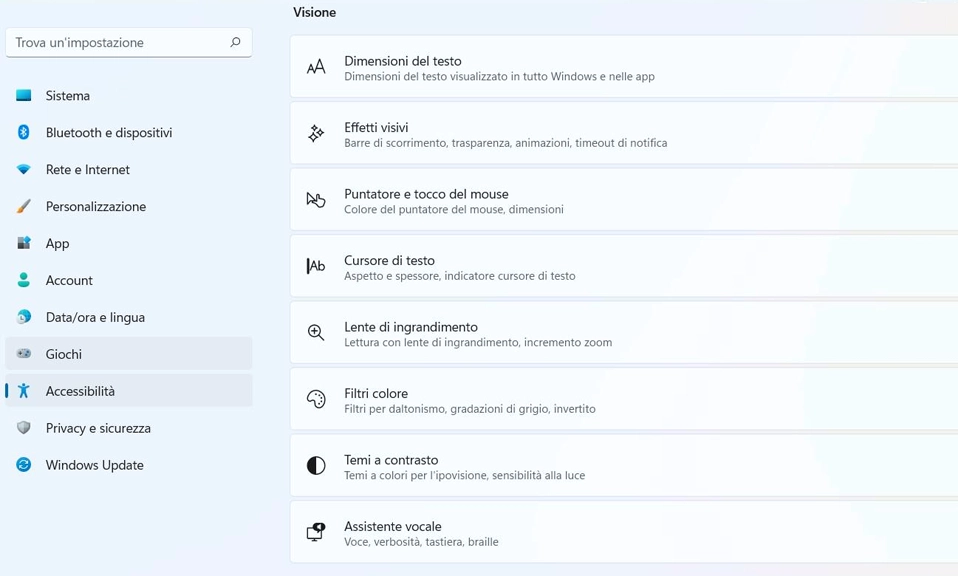
Go to Accessibility.
Select Text size.
Drag the Text size slider to the right until the preview text is comfortable.
Click Apply.
The change takes effect immediately in many parts of Windows, including Settings, File Explorer, and many modern apps. Some apps may need to be closed and reopened before they pick up the new size.
What to expect: Text in the Start menu, Settings, File Explorer, and many built-in apps gets larger. Icons and buttons stay roughly the same size. Some older desktop apps may ignore the setting entirely.
If you need to undo it: Return to the same screen and move the slider back to the default position.
Method 2: Use Display Scaling (Everything Gets Bigger)
If enlarging only the text is not enough—or if some of your apps ignore the text size slider—display scaling is the more comprehensive option. It enlarges the entire interface: text, icons, menus, and app windows.
How to do it:
Open Settings.
Go to System.
Select Display.
Under Scale, choose a larger percentage from the dropdown—for example, 125%, 150%, or 175%.
Sign out and back in if Windows prompts you to.
Important: This does not change your screen resolution. Your display still runs at its native resolution; Windows simply renders the interface larger.
What to expect: Everything becomes bigger and easier to read. On some apps that are not fully optimized for scaling, you may notice slightly softer text or minor layout quirks. Most modern apps handle it well.
The trade-off: You fit less on screen. On a small laptop display, 150% scaling can make windows feel cramped. On a large monitor, it is often the better choice.
Method 3: Use Magnifier for Temporary Zoom
If you only need to enlarge text occasionally—or if you want to zoom in on a specific part of the screen without changing any system-wide settings—Magnifier is the tool for the job.
How to open it: Press Windows key + Plus (+). The Magnifier opens and zooms in. Press Windows key + Esc to close it.
You can also open Magnifier from Settings > Accessibility > Magnifier, where you can choose between Full screen, Lens, and Docked views. Lens mode is particularly useful: it follows your mouse or keyboard focus and magnifies only the area around it.
What to expect: A temporary zoom that does not affect your resolution or your system settings. It is ideal for reading small text in a single app or checking details in an image.
Method 4: Zoom In Inside Individual Apps
Many apps have their own zoom controls, and using them is often faster than changing system-wide settings.
Browsers: Press Ctrl + Plus (+) to zoom in, Ctrl + Minus (-) to zoom out, and Ctrl + 0 to reset.
Microsoft Word, Excel, and PowerPoint: Use the zoom slider in the bottom-right corner, or press Ctrl + Alt + Plus/Minus in some versions.
File Explorer: Hold Ctrl and scroll your mouse wheel up or down to change icon and text size.
Most modern apps: Try Ctrl + Plus/Minus first. Many apps support it even if they do not advertise it.
This approach is useful when you want larger text in one specific app without making everything else on your screen bigger.
Method 5: Adjust ClearType for Sharper Text
ClearType does not make text bigger, but it can make text sharper and easier to read at the size you already have. If your text looks fuzzy after changing scaling, tuning ClearType can help.
How to do it:
Search for ClearType in the Start menu.
Open Adjust ClearType text.
Make sure Turn on ClearType is checked.
Follow the wizard and pick the text sample that looks clearest to you on each screen.
This is especially useful on LCD monitors and laptops where text can look slightly soft after scaling changes.
Method 6: Make the Mouse Pointer and Cursor Easier to See
If you are enlarging text because you are struggling to see small details, it is worth adjusting the mouse pointer and text cursor at the same time. These settings are in Settings > Accessibility > Mouse pointer and touch and Settings > Accessibility > Text cursor. You can enlarge the pointer, change its color, and make the text cursor thicker—all without affecting resolution.
What About Apps That Ignore the Text Size Slider?
Some older desktop applications—especially legacy Win32 apps—do not respond to the Windows text size slider. If an app still has tiny text after you have adjusted the slider, you have three options:
Use display scaling instead. It affects more apps, including many older ones.
Use Magnifier when you need to read that specific app.
Check the app’s own settings for a font size or zoom option.
Start With the Slider, Then Scale If Needed
For most people, the Text size slider under Settings > Accessibility > Text size is the fastest and least disruptive fix. It makes text bigger without changing resolution and without making every icon and button larger.
If that is not enough—or if some of your apps ignore it—switch to Display scaling under Settings > System > Display > Scale. It enlarges the entire interface while keeping your resolution intact. And for occasional needs, Magnifier and per-app zoom shortcuts give you flexibility without committing to a system-wide change.
None of these options require third-party software, and all of them can be undone in seconds. Your resolution stays exactly where it belongs. Your eyes get the break they need.