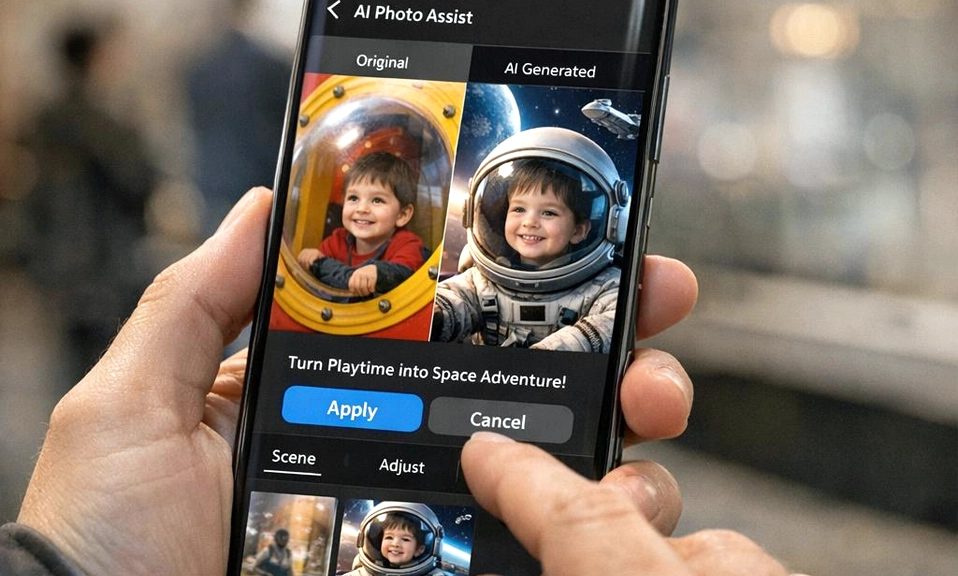
Your phone’s camera is better than any point-and-shoot you’ve ever owned. But the real magic isn’t in the lens—it’s in the AI editing tools that can turn a good snapshot into a photograph that looks professionally edited. Here are seven tricks that will change how you edit, share, and think about your smartphone photos.
1. Generative Fill: Remove Anything, Add Anything, Change Everything
What it does: You circle an object—a trash can, a stranger in the background, a power line—and the AI erases it and fills the space with content that matches the scene. You can also type a description of what you want to add, and the AI generates it: a cloud in an empty sky, a flower in a bare garden, a smile on a face.
Why it transforms your photos: Generative fill removes the limitations of what you captured. A crowded tourist spot becomes a private moment. A cluttered background becomes clean and focused. A dull sky becomes dramatic. It’s the closest thing to a Photoshop expert living inside your phone.
Where to try it: Adobe Photoshop (Generative Fill), Google Photos (Magic Editor), Samsung Gallery (Generative Edit), Apple Photos (Clean Up on iOS 18).
Best for: Travel photos, portraits, product shots, real estate photography, and any image where the background isn’t cooperating.
2. Sky Replacement: Turn a Gray Day Into a Golden Hour
What it does: The AI detects the sky in your photo, replaces it with a dramatic sunset, a moody storm, a starry night, or a soft pastel morning—then adjusts the lighting on the rest of the image so the new sky feels natural.
Why it transforms your photos: Lighting is the single biggest factor in how a photo feels. A flat, overcast sky can make even a beautiful scene look boring. A golden-hour sky can make an ordinary street look cinematic. Sky replacement gives you the lighting you wanted, without waiting for the weather to cooperate.
Where to try it: Luminar Mobile (SkyAI), Adobe Lightroom (Sky masking), Google Photos (Magic Editor), Canva (Sky replacement).
Best for: Landscape photography, travel shots, outdoor portraits, real estate listings.
3. AI Relighting: Change the Direction and Quality of Light After the Fact
What it does: The AI analyzes the scene and lets you add, remove, or reposition light sources. You can brighten a face that was in shadow, add a warm glow to a portrait, or create a dramatic side-light effect on a still life—all after the photo was taken.
Why it transforms your photos: Light is the language of photography. AI relighting lets you speak that language fluently, even if you shot in bad conditions. It can rescue a backlit portrait, add depth to a flat image, or turn a midday shot into something that feels like it was taken at sunset.
Where to try it: Google Photos (Magic Editor), Adobe Photoshop (Neural Filters), Luminar Mobile (Relight AI), Pixelmator Pro (ML Enhance).
Best for: Portraits, product photography, food shots, and any image where the lighting didn’t match your vision.
4. Object-Aware Color Grading: Fix One Color Without Affecting the Rest
What it does: Traditional color grading affects the whole image. AI color grading lets you select a specific object—a red jacket, a blue sky, a green tree—and adjust its color, saturation, and brightness independently of everything else.
Why it transforms your photos: It solves the “one thing is off” problem. Maybe the sky is perfect but the grass is too yellow. Maybe the subject’s skin tone is warm but the background is too cool. AI color grading lets you fix the one thing without compromising the rest.
Where to try it: Adobe Lightroom (Masking > Color Range), Google Photos (Magic Editor > Selective Adjust), Snapseed (Selective tool with AI), VSCO (AI color tools).
Best for: Portraits, landscapes, fashion photography, and any image where the color palette needs refinement.
5. AI Upscaling: Make Low-Resolution Photos Print-Ready
What it does: The AI analyzes a low-resolution image and generates new pixels to increase the resolution—without the blur, noise, or artifacts you’d get from traditional upscaling.
Why it transforms your photos: An old photo from a decade-old phone can become a crisp, detailed image suitable for printing. A cropped section of a group photo can become a standalone portrait. AI upscaling unlocks images you thought were too low-quality to use.
Where to try it: Adobe Lightroom (Super Resolution), Topaz Photo AI, Pixelmator Pro (ML Super Resolution), Google Photos (Zoom Enhance on Pixel devices).
Best for: Old photos, scanned prints, cropped sections, social media images that need to be printed, and any photo from a device with a smaller sensor.
6. Portrait Blur: Add Depth of Field Without a DSLR
What it does: The AI detects the subject and blurs the background, simulating the shallow depth of field you’d get from a fast lens on a dedicated camera. Unlike simple blur effects, AI portrait blur respects the edges of hair, glasses, and complex shapes.
Why it transforms your photos: Depth of field is one of the most powerful tools in photography. It isolates the subject, removes distractions, and makes an image feel more intentional. A phone’s small sensor can’t produce natural bokeh the way a full-frame camera can—but AI can simulate it convincingly.
Where to try it: Apple Photos (Portrait mode in editing), Google Photos (Blur), Samsung Gallery (Portrait blur), Adobe Lightroom (Lens Blur), Focos.
Best for: Portraits, food photography, product shots, and any image where the background is distracting.
7. AI Denoising: Shoot in the Dark and Recover the Detail
What it does: The AI analyzes the noise patterns in a low-light photo and removes them—not by smoothing the whole image, but by distinguishing between actual detail and random noise. The result is a cleaner image that retains sharpness.
Why it transforms your photos: Low-light photography is the hardest challenge for a smartphone camera. AI denoising lets you shoot in situations you’d normally avoid—concerts, candlelit dinners, night streets—and still get usable images. It’s the difference between a grainy, noisy snapshot and a photo you’d be happy to share.
Where to try it: Google Photos (Denoise), Adobe Lightroom (Denoise AI), Apple Photos (Night mode editing), Topaz Photo AI (Denoise), Pixelmator Pro (ML Denoise).
Best for: Night photography, indoor shots without flash, concerts, events, and any image taken in challenging lighting.
Your smartphone camera
is already capable of capturing images that would have required a professional setup a decade ago. But the AI editing tools available in 2026 take it further—removing distractions, adding light, changing skies, upscaling resolution, and denoising noise. These seven tricks can transform ordinary photos into images that look like they were shot and edited by a professional.
The best part? You don’t need to learn complex software. Most of these tools are built into the apps you already use—Google Photos, Apple Photos, Lightroom, Snapseed—and they’re designed to be intuitive. A few taps can make the difference between a snapshot and a photograph.
So stop taking ordinary photos. Use the AI tools you already have. Transform your smartphone pictures into something worth sharing.